An outdoor cat shelter is one of the simplest ways to protect feral and stray cats from dangerous winter weather. With about $20 to $35 in materials and less than an hour, you can build an insulated cat house that keeps cats warm and dry through freezing temperatures.
Why Outdoor Cats Need Winter Shelter
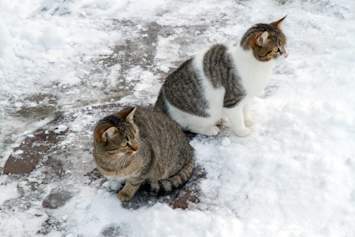
Cats are descended from desert-dwelling ancestors and are not naturally built for cold, but how cold is too cold for cats? Below 45°F, most cats struggle to stay warm. Below 32°F, prolonged exposure puts them at serious risk of hypothermia and frostbite.
When temperatures drop, a cat’s body restricts blood flow to the extremities (ears, tail, paws) to protect vital organs, which is why frostbite targets those areas first. A properly insulated shelter traps body heat in a small space, turning the cat into its own radiator. Two small shelters are always better than one large one because less air space means faster warming.
How to Build a DIY Outdoor Cat Shelter (Rubbermaid Tote Method)
This nested-tote design is the most widely recommended by rescue organizations. It takes about 30 to 60 minutes to build.
What You’ll Need
Materials | Approximate Cost |
Large plastic tote with lid (30 gal) | $8 to $12 |
Small plastic tote with lid (18 to 20 gal) | $5 to $8 |
Straw bale (NOT hay) | $5 to $10 |
Box cutter or utility knife | $3 to $5 (or use one you have) |
Permanent marker | On hand |
Optional: Styrofoam sheet, 1 inch thick | $5 to $8 |
Optional: Plastic flowerpot for entrance tunnel | $2 to $4 |
Estimated total | $20 to $35 |
Step-by-Step Instructions
Mark the entrance. Use the permanent marker to trace a circle about 6 inches in diameter on the large tote. Position it several inches above the base on one of the longer sides to keep rain and snow out.
Cut the entrance. Use a hair dryer to soften the plastic along your marked line, then cut with the box cutter. Softening the plastic first makes cutting much easier and safer.
Add floor insulation. Place a Styrofoam sheet (cut to fit) on the bottom of the large tote. This prevents cold from seeping up through the ground.
Nest the small tote inside. Center the small tote inside the large one, sitting on top of the Styrofoam floor.
Cut a matching entrance in the small tote. Align both totes and use the outer entrance hole as a guide to mark and cut a matching hole in the small tote.
Pack straw between the walls. Fill the gap between the two totes with straw on all sides. This creates your insulation layer.
Fill the inner tote with straw bedding. Add a generous amount of loose straw inside the small tote for the cats to burrow into.
Optional: Create an entrance tunnel. Cut the bottom off a plastic flowerpot to create a tube. Slide it into the aligned entrance holes. This blocks wind and adds another barrier against moisture.
Secure the lids. Place the lid on the small tote first, then the lid on the large tote.
Weigh it down. Place bricks or concrete pavers on top to prevent the shelter from blowing over in wind.
Other DIY Cat Shelter Options
The nested-tote method is not the only approach. A Styrofoam cooler shelter works well if you can source free coolers from vet offices, hospitals, or fish markets. Wrap the cooler in heavy black plastic, seal the seams with waterproof tape like Gorilla Tape, cut a 6-inch entrance, and line the inside with straw. Best Friends Animal Society has a detailed guide for this design.
For an emergency option when you need something tonight, a sturdy cardboard box lined with plastic bags (for waterproofing) and straw can work short term. Place it under an overhang or covered area and replace it frequently, since cardboard breaks down quickly in wet weather.
Insulation Materials for Outdoor Cat Shelters Compared
The insulation you choose matters more than the winter cat shelter design. Here is how common materials stack up:
Material | Warmth | Moisture Resistance | Mold Risk | Verdict |
Straw | High | Repels moisture | Low | Best overall choice |
Hay | Low | Absorbs moisture | High | Never use |
Blankets or towels | Medium when dry | Absorbs moisture | Medium | Avoid outdoors |
Mylar emergency blankets | High (reflects heat) | Waterproof | None | Good added layer |
Styrofoam sheets | High | Waterproof | None | Great for floor and walls |
Straw is the gold standard for outdoor cat shelters. It is dry, hollow, and repels moisture, allowing cats to burrow in and trap body heat. Look for “untacked” straw at farm supply stores like Tractor Supply Co., because some straw is chemically treated. Untacked straw may also be labeled “animal bedding.”
The most common mistake is confusing straw with hay. Hay is animal feed. It soaks up moisture, molds quickly, and makes a shelter damp and cold. For the best results, layer Styrofoam on the floor, straw between the walls, and optionally place Mylar emergency blankets beneath the straw bedding for extra heat reflection.
Where to Place Your Outdoor Cat Shelter
Good placement is just as important as good construction.
Elevate 3 to 4 inches off the ground using 2x4s, cinder blocks, or pallets to prevent moisture from seeping in.
Face the entrance toward a wall or fence with just enough space for a cat to squeeze through. This blocks wind and deters larger predators.
Tilt the shelter slightly so the rear sits higher than the front, allowing rain to drain away from the entrance.
Drill a small drainage hole in the bottom of the outer tote in case water gets inside.
Place behind fencing if dogs are a threat, and camouflage if needed in areas where shelters might be disturbed.
Placing two shelters with their entrances facing each other, with a board across the top, creates a wind-protected area that cats will use as a staging area.
Maintaining Your Cat Shelter
A shelter that is set up and forgotten loses its effectiveness. Replace straw bedding about every three months, or sooner if it looks damp or compressed. After major storms, check for water intrusion and blocked entrances. Shovel snow away from shelter entrances so cats are not trapped. In warmer months, inspect for wasps and other pests before fall setup, and confirm bricks or pavers are still secure.
Task | How Often |
Replace straw bedding | Every 2–3 months, or sooner if damp |
Check for water leaks | After heavy rain or snow |
Clear snow from entrance | After storms |
Inspect shelter for cracks or damage | Monthly during winter |
Re-secure weights (bricks or pavers) | Monthly |
Check for pests (wasps, rodents) | Early fall before winter |
Add fresh straw if heavily used | Mid-winter |
Winter Safety Tips for Outdoor Cats
Shelter is only part of the equation. A few additional steps help outdoor cats make it through winter safely:
Provide extra food. Cats burn more calories maintaining body heat in cold weather. Increase portion sizes when temperatures drop.
Keep water from freezing. Use heated pet water bowls, refresh with warm water daily, or place dark-colored bowls in direct sunlight.
Tap your car hood before starting the engine. Cats crawl into engine compartments and wheel wells for warmth. A quick tap gives them a chance to escape.
Keep antifreeze away from cats. Even small amounts of ethylene glycol are lethal. Switch to pet-safe propylene glycol-based antifreeze and clean all spills immediately.
Avoid ice-melting chemicals near shelters. Many are toxic and can burn paw pads.
If you find a stray cat that appears sick or injured during winter, contact a local rescue organization or your vet for guidance.
When a Cat Needs More Than Shelter
Even with a good shelter, outdoor cats can develop hypothermia or frostbite during severe cold snaps. Watch for these warning signs:
Hypothermia: Shivering (which may stop as the condition worsens), lethargy, cold ears and paws, slow breathing, unresponsiveness.
Frostbite: Pale, gray, or bluish skin on the ears, tail, or paws. Swelling and blisters may appear days after exposure.
If you suspect either condition, move the cat to a warm, dry space immediately. Wrap them in warm towels (run towels through the dryer first). Do not rub frostbitten areas or apply direct heat like heating pads. Contact a veterinarian right away.
Emergency vet visits for cold-weather injuries typically start at $150 to $250 for the exam alone, with treatment costs climbing depending on severity. Emergency treatment for hypothermia or frostbite can cost hundreds to thousands of dollars depending on severity. If you regularly care for a community cat and plan to provide veterinary care, adopting the cat and enrolling in cat insurance before an emergency occurs can help cover future treatment, diagnostics, and hospitalization.