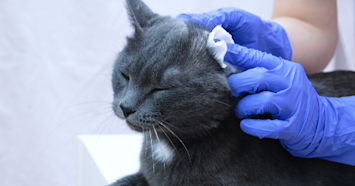
Most cats are excellent self-groomers, but their ears are one spot they simply cannot reach on their own. If you have noticed a bit of brownish wax inside your cat's ear flap, you may be wondering how to clean cat ears safely without causing harm.
When cleaning cat ears, start by gently warming the ear-cleaning solution on a cotton ball for about 15 to 30 seconds. Place the damp cotton ball just inside the ear opening, then massage the base of the ear in small, slow circles for roughly half a minute. Once finished, let your cat shake its head to help loosen and remove debris. Want more tips on what to use, what to avoid, and when to leave it to your vet? Keep reading!
Do Cats Need Their Ears Cleaned?
Most cats do not need routine ear cleaning. Unlike dogs, cats have a relatively short, straight ear canal that allows them to shake out most dirt and debris on their own. Their natural ear wax also serves a purpose: it traps dust and pathogens before they reach the eardrum.
Only clean your cat's ears if you can see a small to moderate amount of wax or debris on the ear flap (pinna). If the ears look pink, clean, and odor-free, leave them alone. Over-cleaning can strip the ear's natural oils and actually increase the risk of irritation and infection.
If you notice redness, swelling, discharge with a strong odor, or your cat seems to be in pain when you touch their ears, do not attempt to clean at home. These are signs of a possible ear infection or ear mites, and your cat needs a veterinary exam before any cleaning is done.
What Healthy vs. Dirty Cat Ears Look Like
Knowing the difference between normal wax and a problem that needs veterinary attention can save you a trip to the vet or, more importantly, prevent you from missing something serious. The Cornell Feline Health Center notes that a variety of conditions can affect cat ears, from congenital defects to infections and trauma.
What You See | What It Likely Means | What to Do |
Pale pink, little to no wax | Healthy ears | No cleaning needed |
Light brown, thin wax on the ear flap | Normal wax buildup | Clean at home if moderate |
Dark brown or black crumbly debris (looks like coffee grounds) | Possible ear mites | See your vet |
Yellow or green discharge with odor | Possible bacterial or yeast infection | See your vet |
Red, swollen, painful to touch | Infection or inflammation | See your vet right away |
According to Cornell University's College of Veterinary Medicine, ear mites (Otodectes cynotis) are the most common cause of ear disease in cats. The mites produce a thick, dark, foul-smelling accumulation of wax and debris that is often visible to the naked eye.
Supplies You Need to Clean Cat Ears
Gather everything before you start so you can keep one hand on your cat at all times.
Vet-approved cat ear cleaning solution. Ask your veterinarian which product is best for your cat. Do not use a product formulated only for dogs.
Cotton balls or gauze pads. These are gentle enough for the delicate ear tissue.
Treats. Reward your cat throughout the process to build a positive association.
A towel or small blanket. Wrapping your cat snugly (the "purrito" technique) can help them feel secure and keep their paws contained.
A helper (optional but very beneficial). A second person can gently hold your cat while you clean.
What NOT to Use on Cat Ears
Several common household products can seriously harm your cat's ears. Cats are more sensitive to ototoxicity (ear-related toxicity) than dogs, so using the wrong product can cause lasting damage.
Product | Why It Is Dangerous |
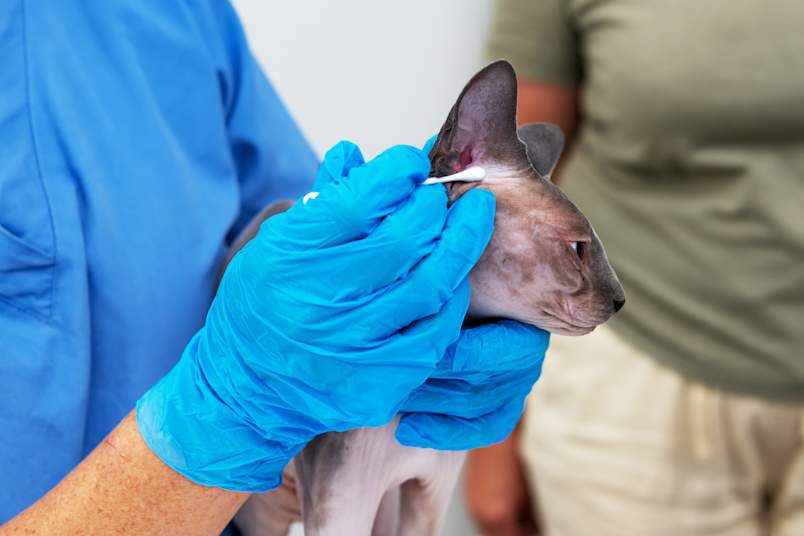
Cotton swabs (Q-tips) | Can rupture the eardrum or push debris deeper into the canal |
Hydrogen peroxide | Irritates delicate ear tissue and can damage the ear canal |
Rubbing alcohol | Causes burning and drying, especially in inflamed ears |
Vinegar | Too acidic for sensitive feline ear tissue |
Essential oils (tea tree, etc.) | Toxic to cats and can cause neurological damage |
Water alone | Does not dissolve wax and can encourage bacterial growth |
How to Clean Cat Ears: Step-by-Step
Get Set Up
Find a comfortable spot and wait until your cat is calm and relaxed. After a meal or play session tends to work well. If your cat is squirmy, wrap them gently in a towel with only their head exposed. Have all of your supplies within arm's reach.
Apply the Ear Cleaner
Saturate a cotton ball with the ear cleaning solution, then warm it in your hand for 15 to 30 seconds. This brings the solution closer to body temperature and avoids startling your cat with a cold liquid.
Fold back the ear flap and gently place the saturated cotton ball against the opening of the ear canal. Squeeze gently to release the solution into the ear. If you prefer, you can apply a few drops directly from the bottle into the ear canal, but avoid pushing the bottle tip into the ear.
Massage and Let Your Cat Shake
With the ear flap still folded back, massage the base of the ear for about 30 seconds. You should hear a squishing sound as the solution loosens wax and debris deeper in the canal. Then step back and let your cat shake their head. This is a normal and important part of the process. It helps move loosened debris out of the ear canal.
Wipe and Repeat
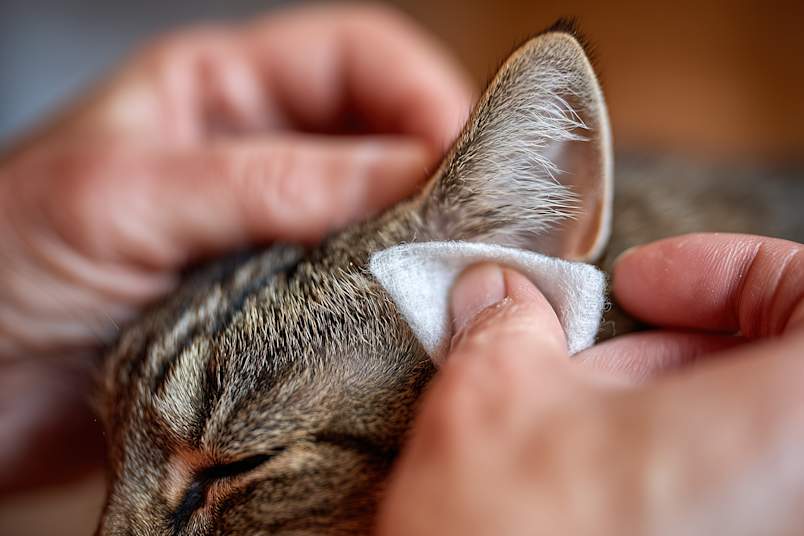
Use a dry cotton ball or gauze to gently wipe away any visible wax and cleaning solution from the ear flap and the opening of the ear canal. Never insert anything into the ear canal itself.
Repeat the process on the other ear. When you are finished, reward your cat with their favorite treat.
If your veterinarian has prescribed ear medication, apply it after cleaning and drying the ears. Ask your vet whether you should wait a few minutes between cleaning and applying medication, as some cleaners can reduce the effectiveness of certain ear drops.
Stop immediately if your cat shows signs of pain or distress. If your cat will not tolerate ear cleaning at home, your veterinarian can clean and examine the ears under sedation if needed.
How to Clean Cat Ears Without a Commercial Solution
A vet-approved ear cleaner is always the safest and most effective option. If you do not have one on hand, you can use a dry cotton ball to gently wipe visible wax from the outer ear flap. This removes surface debris without introducing moisture into the ear canal.
Do not substitute household products like olive oil, coconut oil, or diluted vinegar without your veterinarian's guidance. These home remedies do not dissolve wax effectively and can create a moist environment that encourages bacterial or yeast growth.
If you are unsure which ear cleaning product to buy, you can contact your vet's office for a recommendation or reach out to Embrace PawSupport for 24/7 telehealth guidance.
How Often Should You Clean Cat Ears?
Healthy cats with clean-looking ears rarely need cleaning at all. For cats with mild, recurring wax buildup, cleaning once every two to three months is usually sufficient.
Certain breeds may need more frequent ear care. Scottish Folds, for example, have folded ear flaps that can trap moisture and debris. Hairless breeds like the Sphynx tend to produce more ear wax than other cats, while the Maine Coon has large ears and long ear tufts that can collect debris more easily. Ask your veterinarian how often your specific cat should have their ears cleaned.
But remember, more is not better. Over-cleaning can strip the ear canal's natural protective oils, cause irritation, and paradoxically make infections more likely. Your veterinarian will want you to remember that cats are not small dogs, in more ways than one, so even though they may need frequent ear cleaning to prevent ear infections in dogs, your cat likely does not.
Signs of a Cat Ear Infection
Sometimes what looks like dirty ears is actually an ear infection (otitis externa) that needs veterinary treatment, not a home cleaning. Watch for these signs:
Persistent scratching at the ears or rubbing ears against furniture
Scabs or wounds on the outside of the ear that indicate frequent scratching
Frequent head shaking or head tilting
Dark, crumbly discharge that resembles coffee grounds (often ear mites)
Yellow, green, or foul-smelling discharge
Redness or swelling inside the ear
Loss of balance or walking in circles (indicates the middle or inner ear may be affected)
If you notice any of these symptoms, skip the home cleaning and schedule a vet visit. Cleaning an infected ear without proper diagnosis can be painful for your cat and may push infected material deeper into the canal.
The most common cause of ear infections in cats is ear mites, especially in kittens. According to Cornell University's College of Veterinary Medicine, untreated otitis externa can spread to the middle and inner ear, potentially causing permanent hearing loss.
How Much Does a Cat Ear Infection Cost?
A vet visit for an ear infection typically costs between $150 and $300 once you factor in the exam, cleaning, and medication. Cats prone to ear issues may need multiple visits before the infection fully resolves, and costs climb quickly if the infection spreads to the middle or inner ear. According to Embrace's 2024 claims data, the average otitis externa claim was $204. If your cat is covered by a cat insurance policy, it typically includes ear infection treatment, so you can focus on getting your cat the care they need rather than worrying about the bill.
With a gentle technique and a watchful eye, you can handle minor buildup at home and recognize when it is time to call your vet for some professional help.